Add Contacts
You can add Contacts one at a time via API or manually, or add many at once by bulk uploading a CSV.1. Add Contacts programmatically via API
You can add contacts programmatically using the contacts endpoint.first_name: The first name of the contact.last_name: The last name of the contact.unsubscribed: Whether the contact is unsubscribed from all Broadcasts.properties: A map of custom property keys and values to create (learn more about custom properties).
2. Add Contacts manually
- Go to the Contacts page, and select Add Contacts.
- Select Add Manually.
- Add the email address of the contact in the text field (separated by commas or new lines for multiple contacts).
- Optionally add the contact to an existing Segment.
- Confirm and click Add.
Contacts are also created automatically when an
Automation runs for an email address
that doesn’t yet exist in your Audience.
Bulk upload by CSV
You can add many Contacts at once by uploading a CSV file (up to 200MB), either from the dashboard or programmatically.From the dashboard
- Go to the Contacts page, and select Add Contacts.
- Select Import CSV.
- Drag and drop or click to upload your CSV file from your computer.
- Resend uses AI to read your column headers and suggest field mappings. Review and adjust the mappings to
email,first_name,last_name, andunsubscribed, or to any existing Contact properties. You can also map a column to a new custom property and Resend will create it for you. Use the checkboxes to include or exclude individual columns; theemailcolumn is always included. - Optionally add the contacts to an existing Segment.
- Select Continue, review the contacts, and finish the upload.
If a Contact with the same email address already exists, the import updates
the existing Contact with the new data.
Using the API, CLI, or MCP
You can also create and track imports programmatically with the Contacts Import API and SDKs, the CLI, or the MCP server. These support the same column mapping and let you seton_conflict to upsert (update existing Contacts) or skip (leave them untouched).
Contact Properties
Contact Properties can be used to store additional information about your Contacts and then personalize your Broadcasts.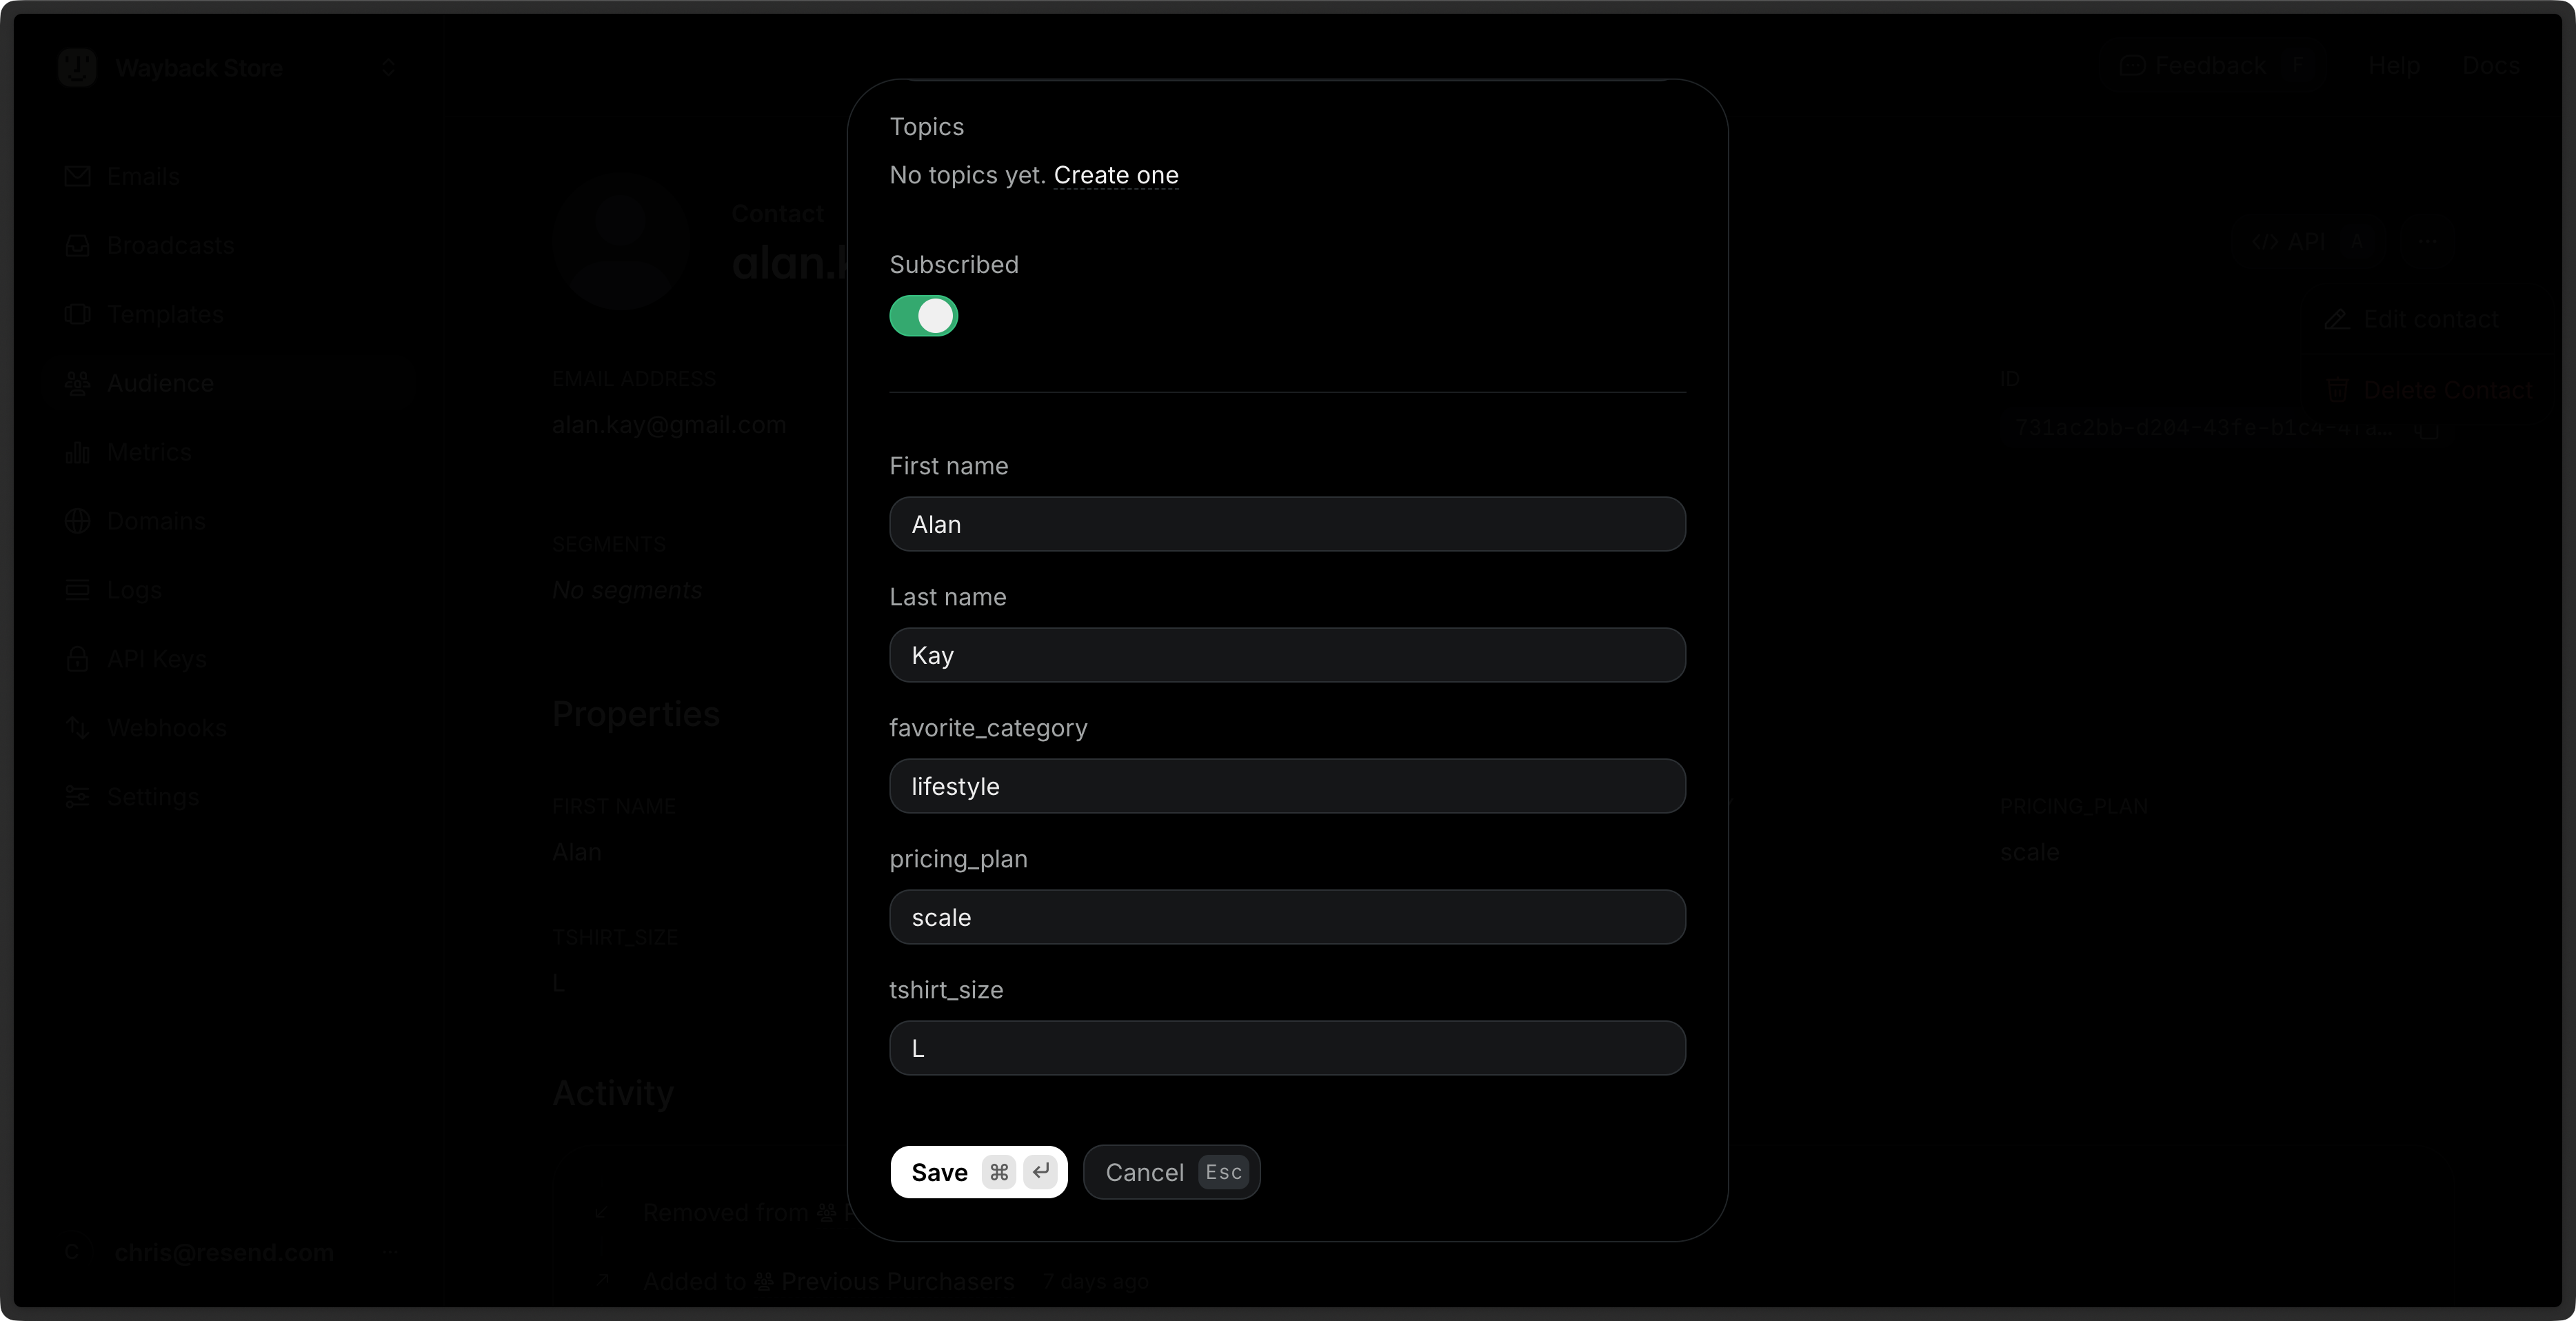
first_name: The first name of the contact.last_name: The last name of the contact.unsubscribed: Whether the contact is unsubscribed from all Broadcasts.email: The email address of the contact.
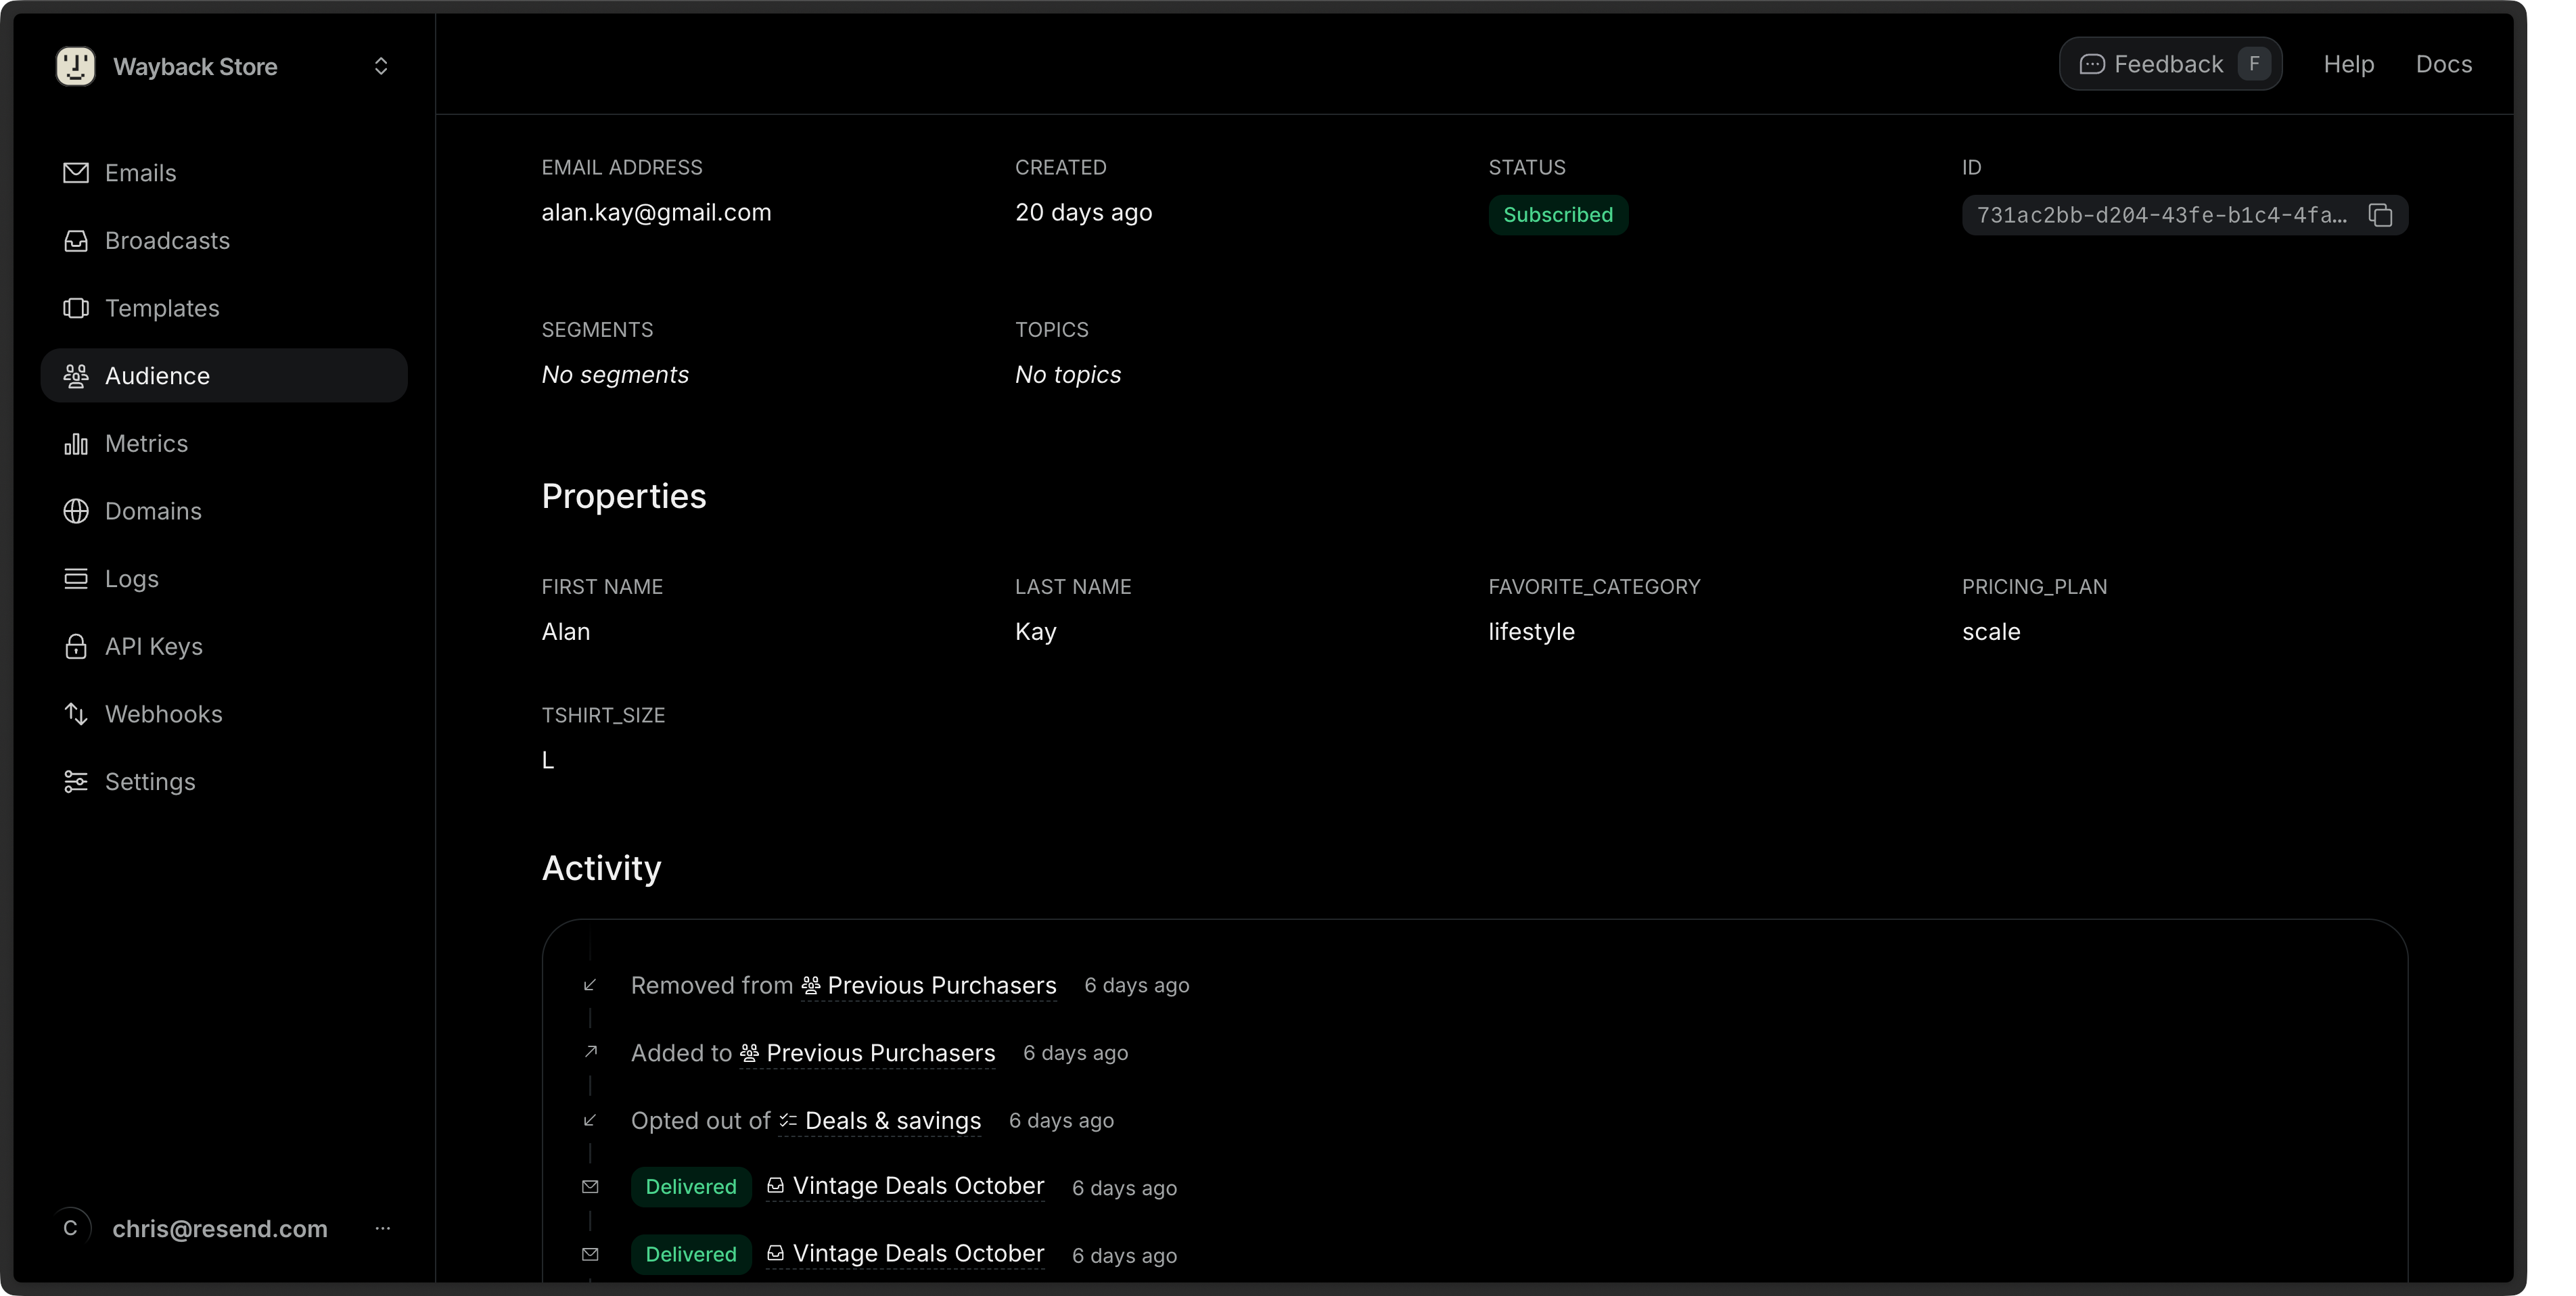
View Contacts
You can view your Contacts in the Contacts page.- Go to the Contacts page.
- Click on the Contact you want to view.
- View the Contact details.
Edit Contacts
- Go to the Contacts page.
- Click on the More options button and then Edit Contact.
- Edit the Contact details and choose Save.
id or email of the Contact.
Bulk Actions
You can perform actions on multiple Contacts at once by selecting them from the Contacts page.- Go to the Contacts page.
- Select multiple Contacts by clicking the checkbox next to each Contact.
- Click the Edit button in the bulk actions bar.
- Choose an action:
- Add to segments: Add the selected Contacts to one or more Segments.
- Subscribe to topics: Subscribe the selected Contacts to one or more Topics.
Delete Contacts
- Go to the Contacts page.
- Click on the More options button and then Delete Contact.
- Confirm the deletion.